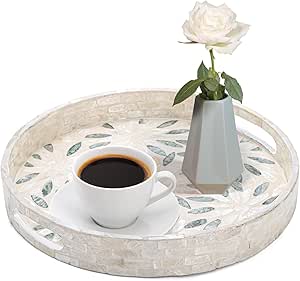
Wooden serving trays are a staple in many homes, serving both functional and aesthetic purposes. A round wooden serving tray can be more than just a piece of kitchenware; it can be a canvas for creativity and a reflection of your personal style. In this article, we will explore various methods to personalize your round wooden serving tray, making it a unique piece that stands out in your home décor or serves as a thoughtful gift.
The Appeal of Personalization

Personalizing items in your home adds a unique charm and character that store-bought items often lack. When it comes to wooden serving trays, personalization enhances their value and meaning. Here are some compelling reasons why you might consider personalizing your tray:
- Express Yourself: Customized items allow you to showcase your personality and style.
- Thoughtful Gifts: A personalized tray can make a heartfelt gift for friends and family.
- Home Décor: A uniquely designed tray can serve as an eye-catching centerpiece in your kitchen or dining area.
- Memorable Keepsakes: Personalization often turns functional items into cherished mementos.
Materials and Tools You Will Need

Before diving into the personalization process, gather the necessary materials and tools. Here’s a quick list:
- Round wooden serving tray (available at craft stores or online)
- Sandpaper (medium and fine grit)
- Wood stain or paint
- Stencils or vinyl decals (optional)
- Paintbrushes or sponge brushes
- Wood sealant (food-safe finish if necessary)
- Optional: Wood burning tool for engraving
- Optional: Decorative elements like rope, fabric, or embellishments
Step-by-Step Personalization Techniques

Now that you have your materials ready, let’s explore a few popular techniques for personalizing your wooden serving tray.
1. Staining or Painting

A fresh coat of stain or paint can dramatically change the look of your tray. Here’s how to do it:
- Sand the Surface: Start with medium-grit sandpaper to remove any existing finish, then follow up with fine-grit sandpaper for a smooth surface.
- Choose Your Color: Select a wood stain or paint color that complements your home décor.
- Apply the Stain/Paint: Use a paintbrush or sponge brush to apply an even coat. Let it dry and apply additional coats if necessary.
Staining enhances the natural grain of the wood, while paint offers a bold pop of color. Both methods can be used in combination for a layered effect.
2. Using Stencils or Vinyl Decals

Stencils and vinyl decals are excellent for adding intricate designs or personalized text to your tray. Here’s how:
- Choose Your Design: Select or create a stencil or decal that resonates with you, such as a monogram, quote, or floral pattern.
- Secure the Stencil: Use painter’s tape to hold the stencil in place, ensuring it doesn’t shift during painting.
- Apply Paint: Use a sponge brush to dab paint over the stencil. Remove the stencil carefully while the paint is still wet to avoid smudging.
This method allows for creativity and can lead to stunning results, especially with intricate designs.
3. Wood Burning

If you’re looking for a more permanent and rustic form of personalization, consider wood burning. It’s an art form that adds depth to your design:
- Get a Wood Burning Tool: Purchase a wood burning tool designed for crafting.
- Sketch Your Design: Lightly sketch your design on the tray using a pencil.
- Burn the Design: Carefully trace over your sketch with the heated wood burning tool, applying varying pressure for different effects.
Wood burning creates a unique texture and can look incredibly striking on a wooden surface.
Adding Decorative Elements
To further enhance your personalized tray, consider adding decorative elements. These can complement your design and add a touch of whimsy. Here are some ideas:
- Rope or Twine: Use natural rope or twine to wrap the edges of the tray for a rustic look.
- Fabric Lining: Line the bottom of the tray with a themed fabric, such as a checkered pattern for a country vibe.
- Embellishments: Add small embellishments like beads, shells, or buttons to give your tray a unique flair.
Caring for Your Personalized Tray
Once you’ve completed your personalized serving tray, it’s important to care for it properly to ensure its longevity. Here are some tips:
- Use Food-Safe Sealant: If your tray will be used for serving food, make sure to apply a food-safe sealant.
- Clean Gently: Avoid soaking your tray in water; instead, wipe it down with a damp cloth.
- Avoid Harsh Chemicals: Use mild soap and avoid abrasive cleaners that can damage the finish.
Case Studies: Real-Life Examples of Personalized Trays
To further inspire your personalization journey, let’s look at some successful examples of personalized wooden trays:
- Wedding Gift Tray: A couple received a wooden serving tray engraved with their wedding date and initials. It became a centerpiece at their home and a conversation starter for guests.
- Family Recipe Tray: A family created a tray featuring their favorite recipes burned into the wood. It serves as a functional piece in the kitchen and a sentimental keepsake.
- Seasonal Decor Tray: One creative individual personalized a tray with seasonal designs, changing it out for different holidays, making it versatile for various occasions.
Personalizing your round wooden serving tray is an enjoyable and rewarding DIY project that not only enhances your home décor but also gives you a chance to express your creativity. Whether you choose to stain, paint, use stencils, or engage in wood burning, the possibilities are endless. By adding decorative elements, you can make your tray truly one-of-a-kind. Remember to care for your personalized piece to maintain its beauty over time. With the right tools and techniques, you can create a stunning serving tray that reflects your personal style and serves as a cherished item for years to come.
Take the plunge into the world of DIY personalization, and enjoy the journey of transforming a simple wooden tray into a beautiful work of art!


